> ## Documentation Index
> Fetch the complete documentation index at: https://guide.smore.im/llms.txt
> Use this file to discover all available pages before exploring further.

# 재피어 (Zapier)

> Salesforce, Notion 등 6000개 이상의 앱과 스모어를 자유롭게 연결하여, 업무 자동화를 실현해 보세요.

<img className="rounded-2xl" src="https://mintcdn.com/dodamind-705e6e3b/9Joc_GOcw_8cyIfn/integrations/images/thumb-3.jpg?fit=max&auto=format&n=9Joc_GOcw_8cyIfn&q=85&s=dc8d3e9d89f72cf04573da038a0b91f1" alt="image_0" width="2083" height="833" data-path="integrations/images/thumb-3.jpg" />

## Zapier, 이럴 때 사용하면 좋아요 🙂

* 응답자가 자신의 답변지를 받게 하고 싶어요
* 응답 알림 이메일을 받을 수 없나요?
* 답변지의 첨부 파일을 일괄 다운로드 하고 싶어요.
* GA, 픽셀(Pixel), 고객 DB 등에 스모어 응답을 연동하고 싶어요.

<Danger>
  zapier는 새로운 응답을 기준으로 작동합니다. 꼭 **콘텐츠 배포 전에 연동**을 해주세요!
</Danger>

<Danger>
  zapier 연동 기능을 이용하시려면, 먼저 **활성화된 Zapier 계정**을 보유하고 있어야 해요!
</Danger>

### **연동 방법**

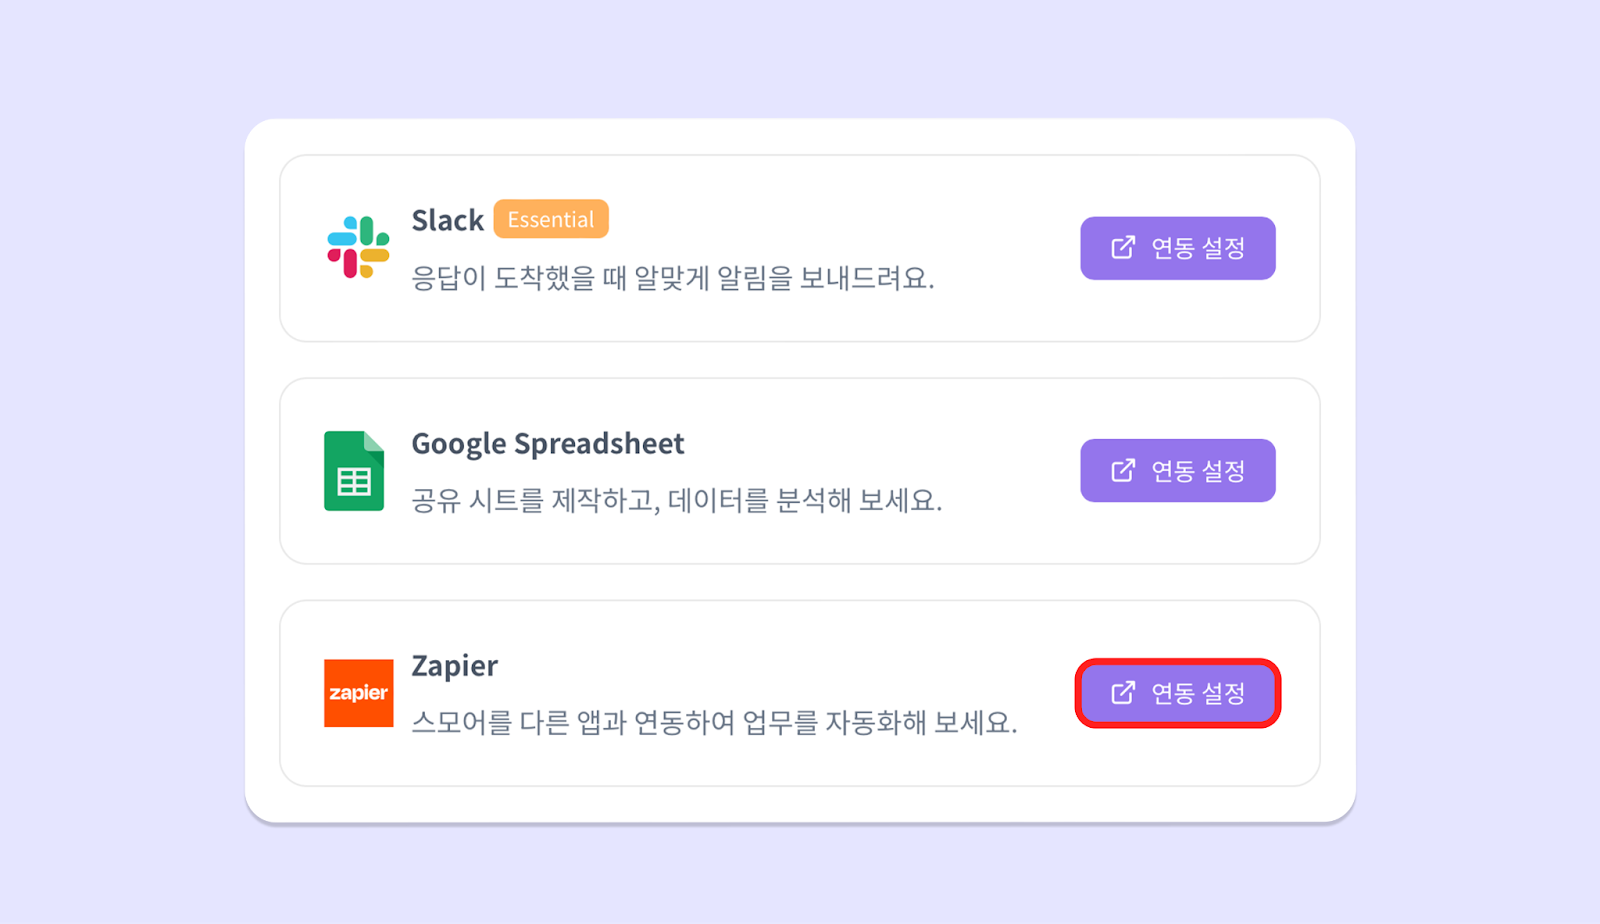
1. **\[퍼블리싱]**-**\[연동]**-\*\*\[Zapier 연동 설정]\*\*을 클릭해 주세요.

<img className="rounded-2xl" src="https://mintcdn.com/dodamind-705e6e3b/9Joc_GOcw_8cyIfn/integrations/images/image-8.png?fit=max&auto=format&n=9Joc_GOcw_8cyIfn&q=85&s=f4f33dbb16a431dfc4f34e1b49cd12be" alt="image_1" width="1600" height="924" data-path="integrations/images/image-8.png" />

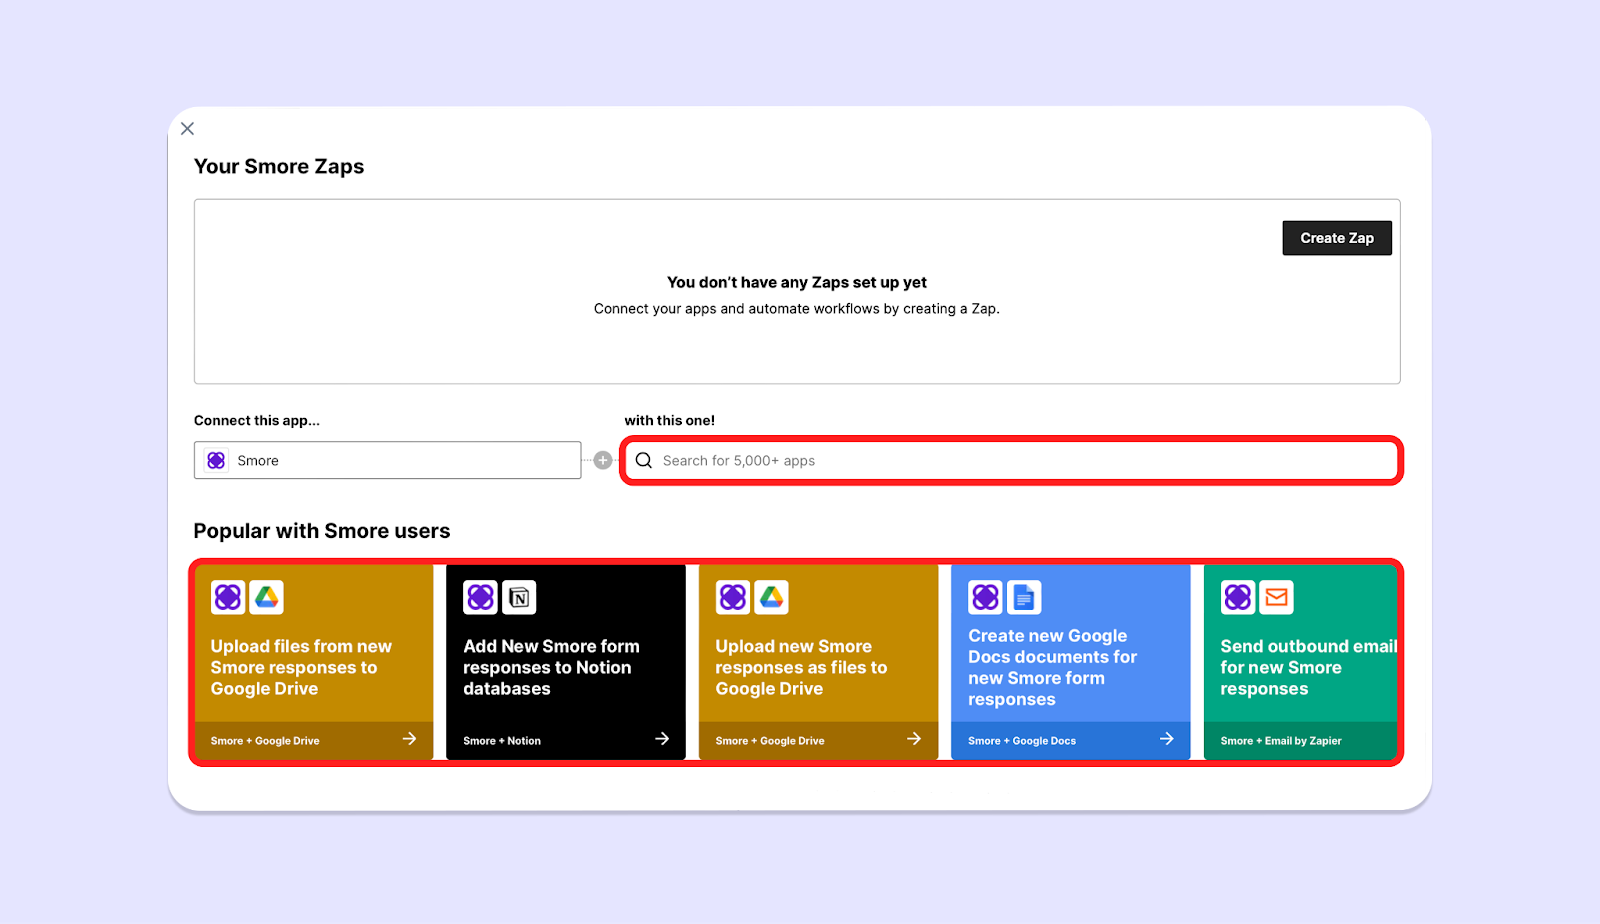
2. **\[연결하기]** 버튼을 눌러, Zapier에 로그인해 주세요. 이후 **원하는 앱을 검색**해서 연결하거나, **스모어가 미리 준비해 둔 템플릿**을 이용할 수 있어요.

<img className="rounded-2xl" src="https://mintcdn.com/dodamind-705e6e3b/9Joc_GOcw_8cyIfn/integrations/images/image-9.png?fit=max&auto=format&n=9Joc_GOcw_8cyIfn&q=85&s=77722b9d69066a869a82cdd294b909a9" alt="image_2" width="1600" height="924" data-path="integrations/images/image-9.png" />

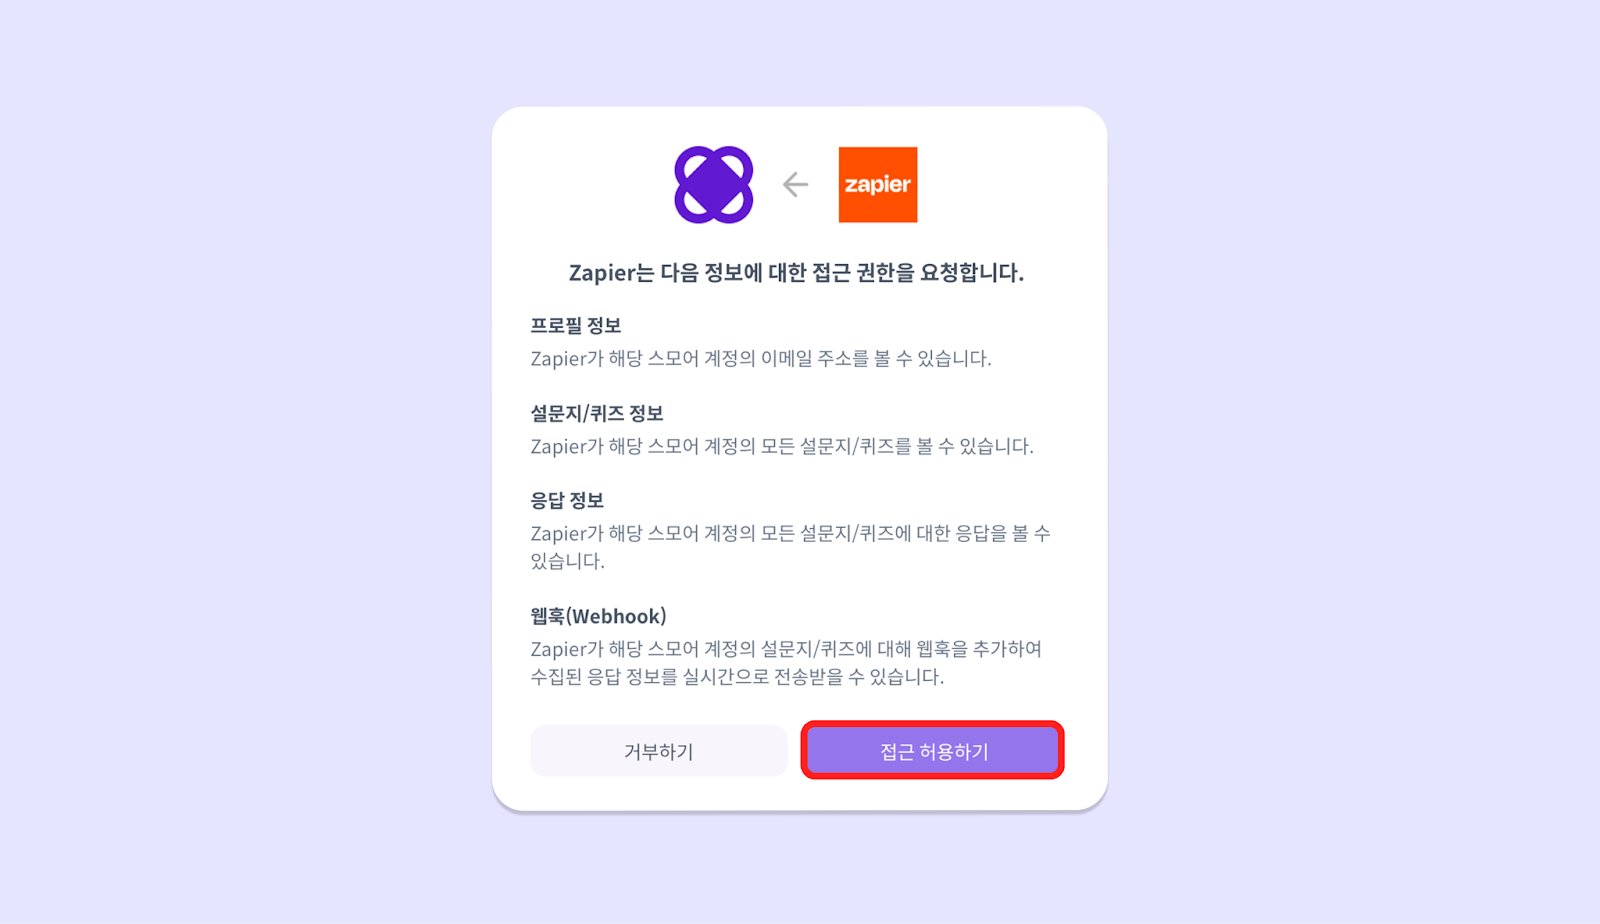
3. 스모어와 Zapier의 연동을 동의해 주세요.

<img className="rounded-2xl" src="https://mintcdn.com/dodamind-705e6e3b/9Joc_GOcw_8cyIfn/integrations/images/image-10.png?fit=max&auto=format&n=9Joc_GOcw_8cyIfn&q=85&s=e5e3ffa5c907017e11bffed193eb1a06" alt="image_3" width="1600" height="924" data-path="integrations/images/image-10.png" />

4. 연결하고 싶은 Form을 선택하고, Test를 진행합니다

<img className="rounded-2xl" src="https://mintcdn.com/dodamind-705e6e3b/9Joc_GOcw_8cyIfn/integrations/images/image-11.png?fit=max&auto=format&n=9Joc_GOcw_8cyIfn&q=85&s=cf470640a7a24a14c27311115c7a7ed4" alt="image_4" width="1600" height="924" data-path="integrations/images/image-11.png" />

<Tip>
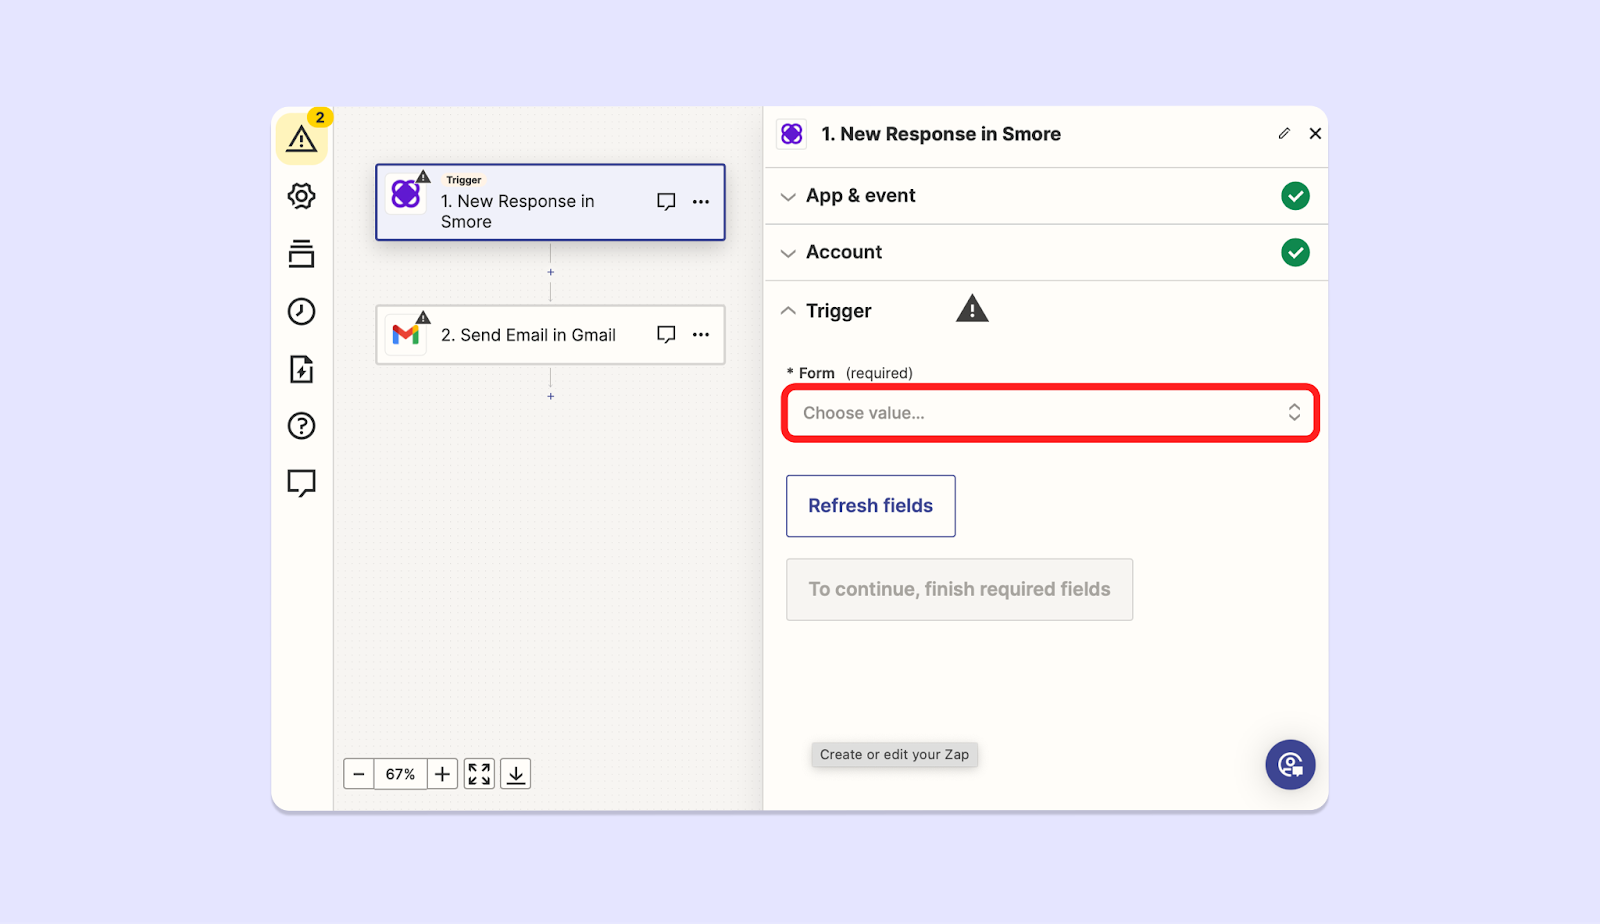
  ‘**느낌표 표시가 되어있는 부분을 체크 표시로 하나씩 바꾼다**’ 라고 생각하면서 절차를 진행하면 어렵지 않아요!
</Tip>

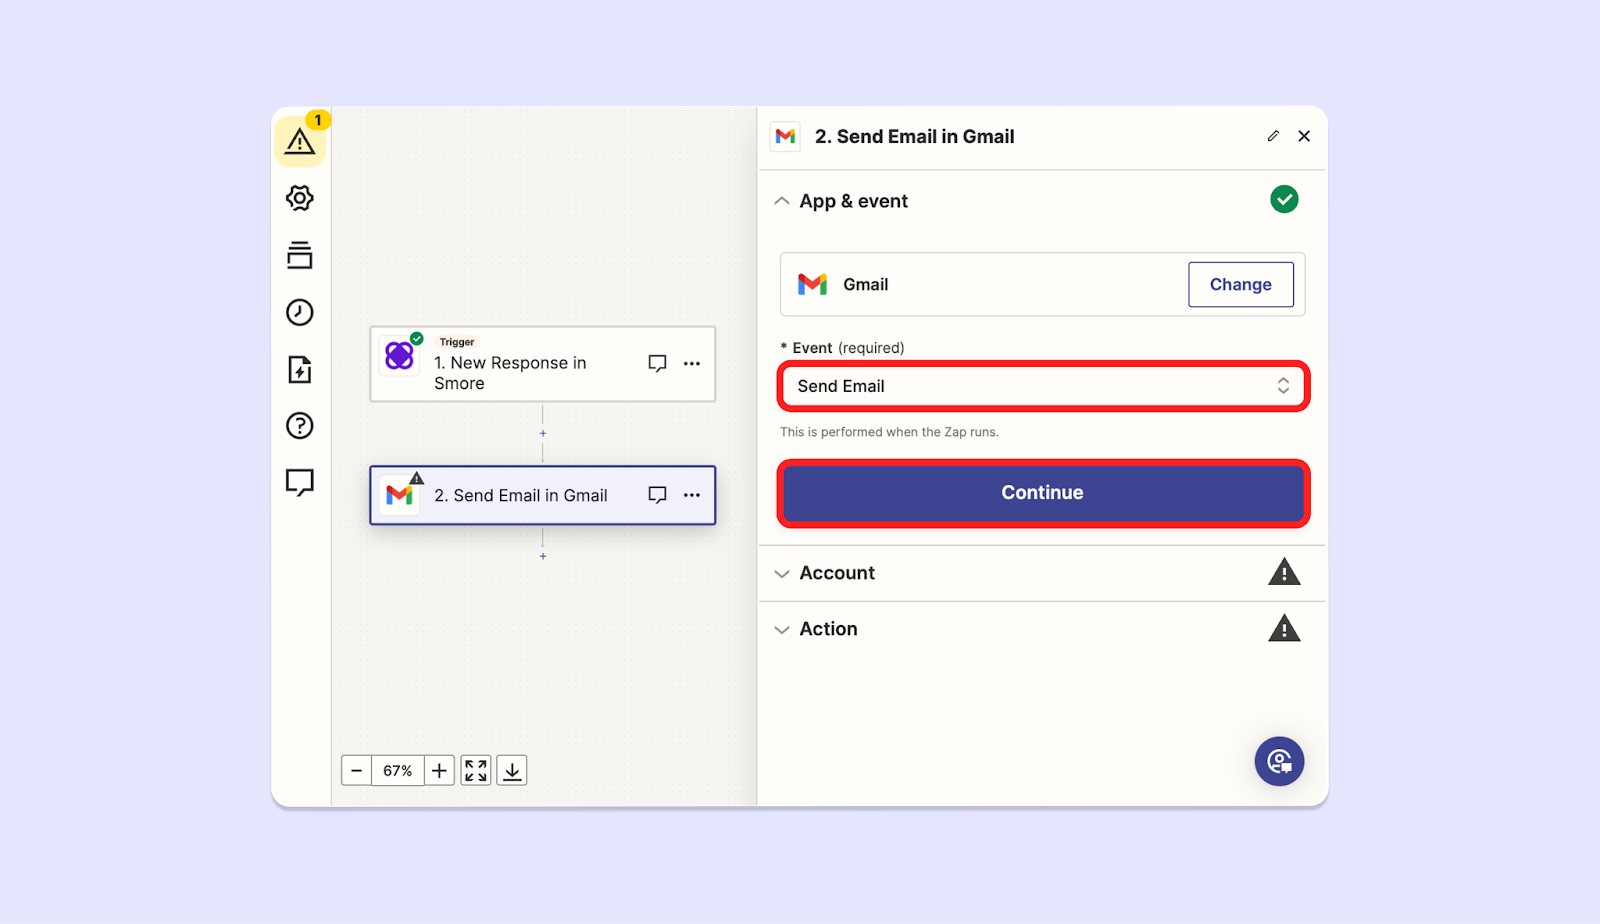
5. 연결할 앱의 이벤트를 설정해주세요.

<img className="rounded-2xl" src="https://mintcdn.com/dodamind-705e6e3b/9Joc_GOcw_8cyIfn/integrations/images/image-12.png?fit=max&auto=format&n=9Joc_GOcw_8cyIfn&q=85&s=9fa9afbadfe4d41cceb4ce967d5268de" alt="image_5" width="1600" height="924" data-path="integrations/images/image-12.png" />

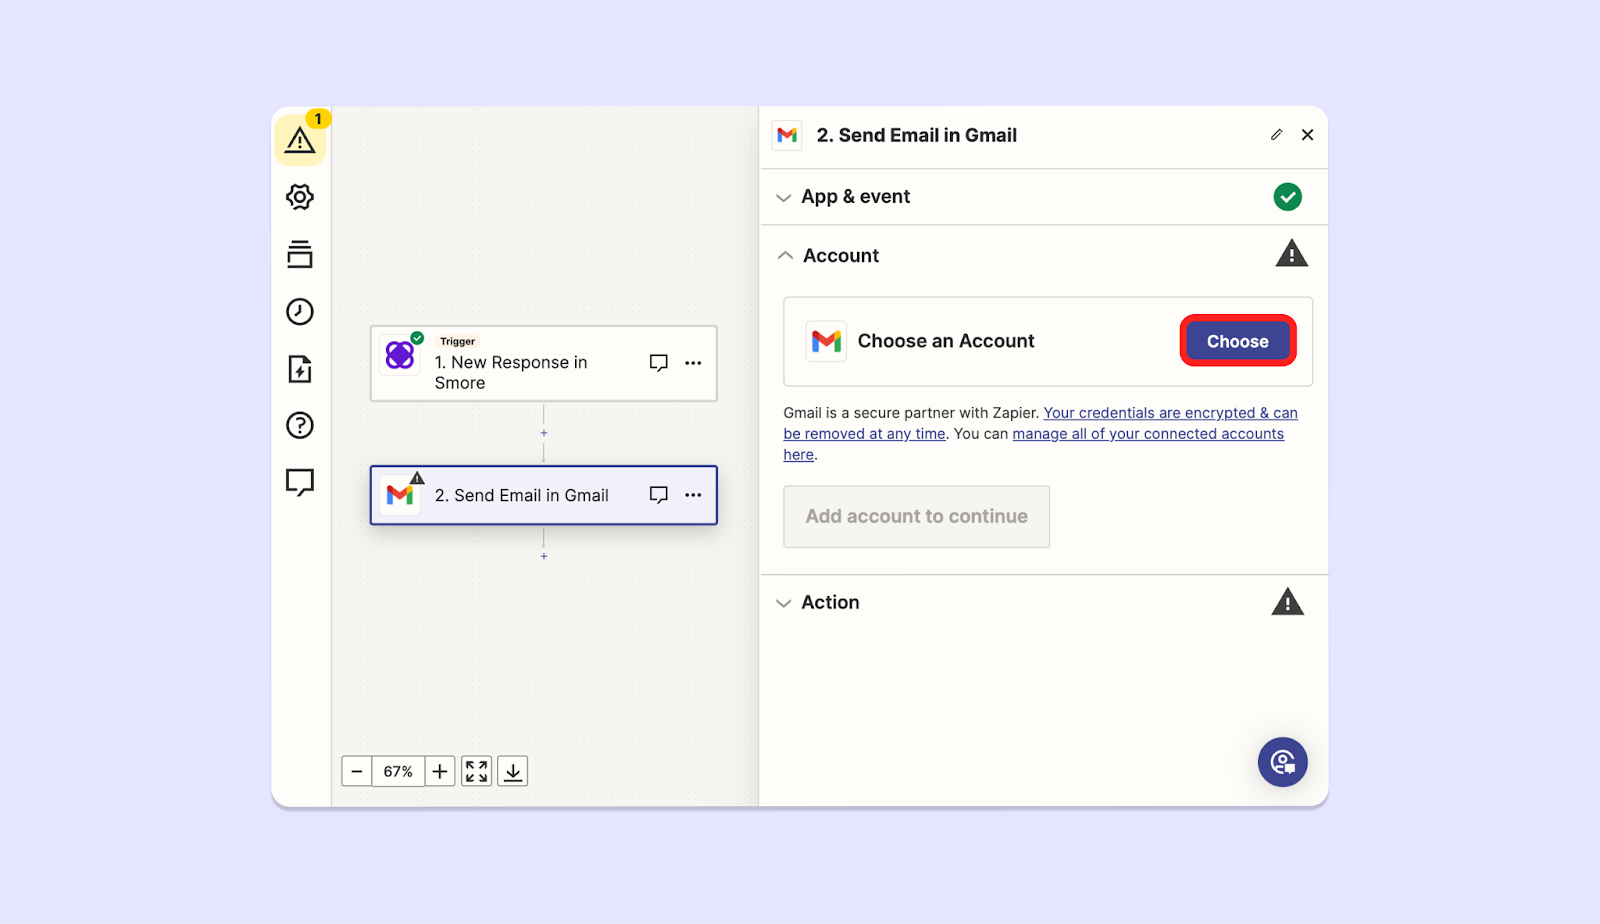
6. **\[Choose]** 버튼을 눌러 연결할 앱에 로그인해주세요.

<img className="rounded-2xl" src="https://mintcdn.com/dodamind-705e6e3b/9Joc_GOcw_8cyIfn/integrations/images/image-13.png?fit=max&auto=format&n=9Joc_GOcw_8cyIfn&q=85&s=390014ad0d4f311dae5d1f7fb06e6fa7" alt="image_6" width="1600" height="924" data-path="integrations/images/image-13.png" />

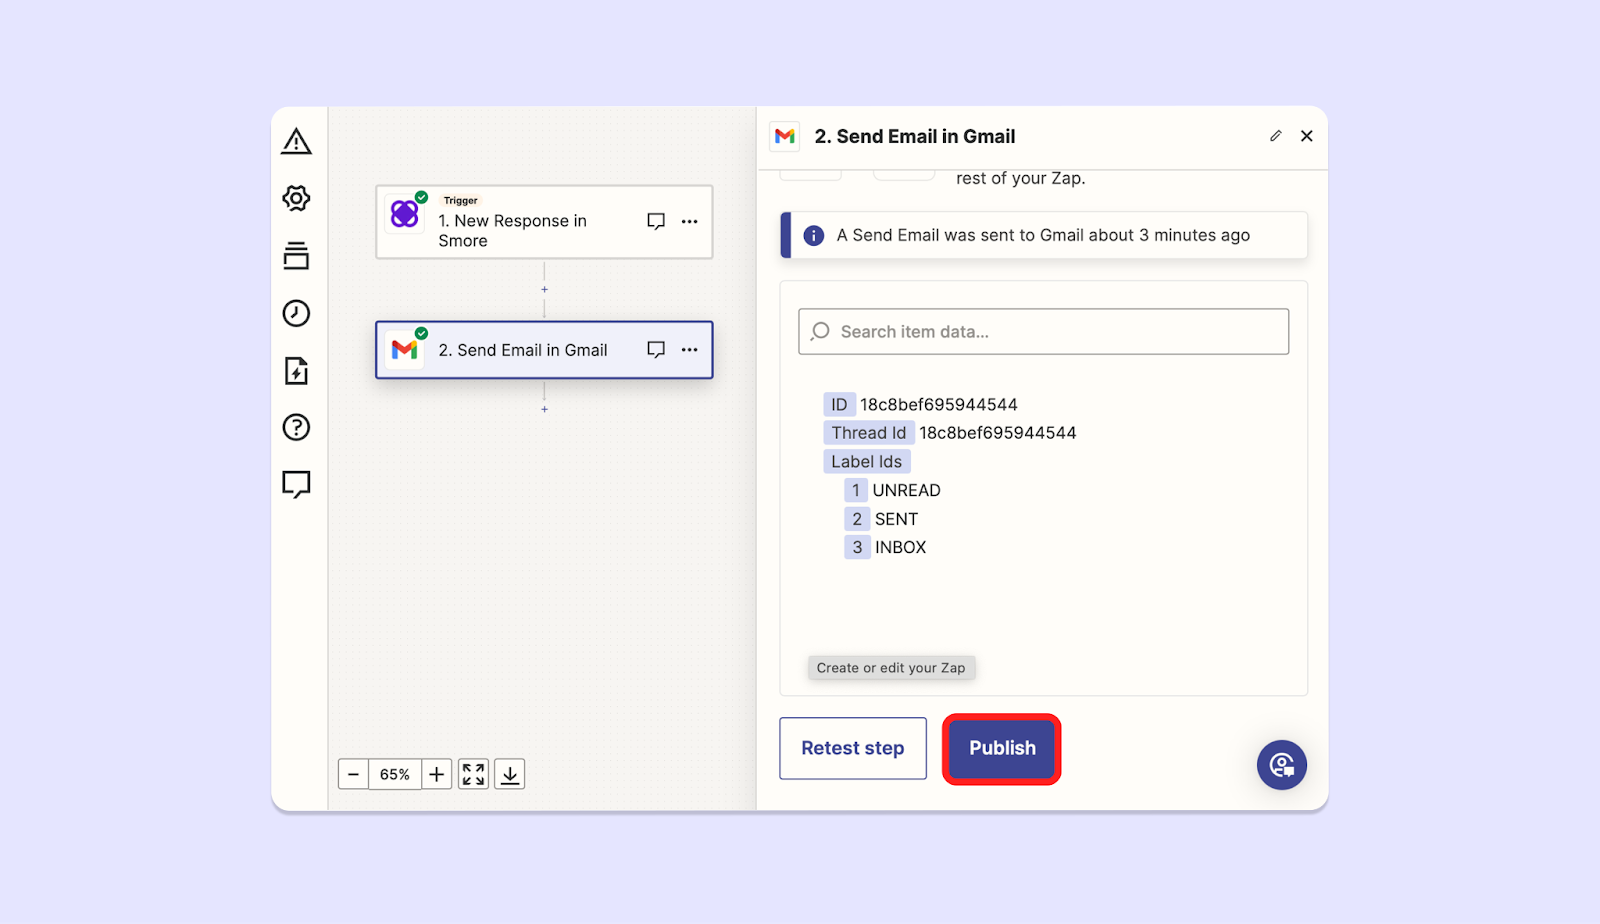
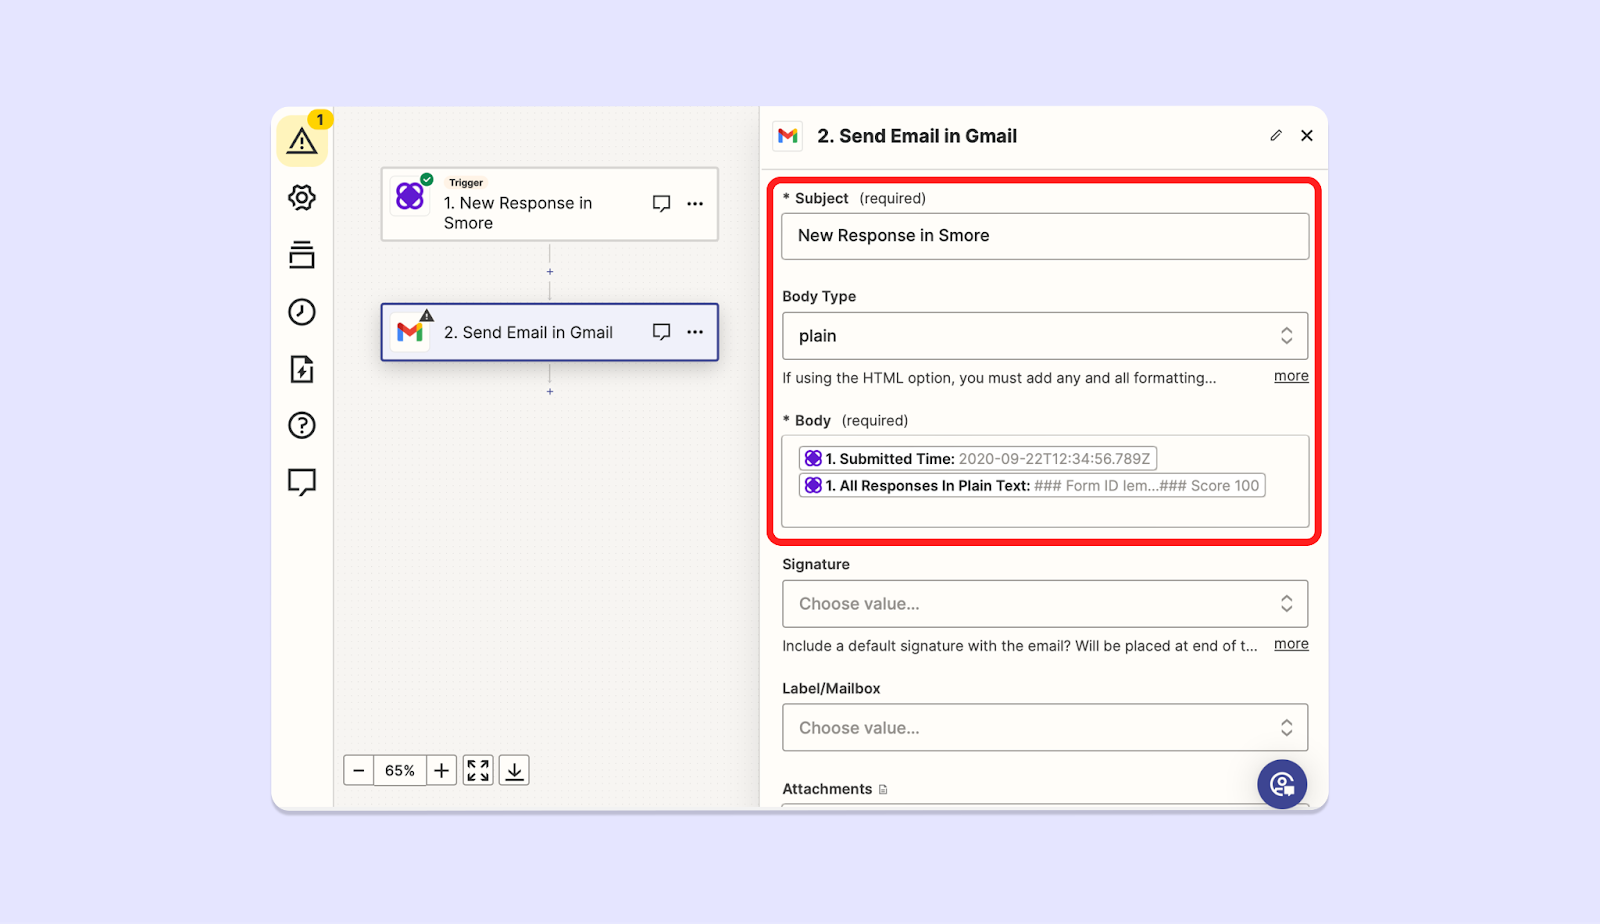
7. 사용할 Action을 지정하고 Test를 진행해 주세요.

<img className="rounded-2xl" src="https://mintcdn.com/dodamind-705e6e3b/9Joc_GOcw_8cyIfn/integrations/images/image-14.png?fit=max&auto=format&n=9Joc_GOcw_8cyIfn&q=85&s=797fc43a504a5118d8fc25fd17eb2990" alt="image_7" width="1600" height="924" data-path="integrations/images/image-14.png" />

8. **Publish 버튼**을 누르면 끝! 🎉

<img className="rounded-2xl" src="https://mintcdn.com/dodamind-705e6e3b/9Joc_GOcw_8cyIfn/integrations/images/image-15.png?fit=max&auto=format&n=9Joc_GOcw_8cyIfn&q=85&s=1569a7fd6bd6c90f4d07bc14a12bd390" alt="image_8" width="1600" height="924" data-path="integrations/images/image-15.png" />
